

Run in GitHub Actions
Midscene provides midscene-action to run Midscene Test in GitHub Actions.
- Automatically add test results to the workflow Summary.
- Save HTML reports and test data as artifacts for download.
- Optionally publish reports to Cloudflare Workers for online previews.
If you do not have a test project yet, start with Create and use test projects.
Examples
- Basic: submit a greeting form with AI and check the result.
- TodoMVC: manage todos with AI and verify the results with custom Nodes.
Add the Action to your workflow
Before running the Action, install test dependencies, prepare browsers or devices, and configure your model. Then add this step to your workflow:
working-directory: The test project path relative to the repository root. Use.if the project is at the root.command: The command to run in the test project directory. It defaults tonpx midscene-test; you can use your project's test command, such aspnpm test.
Complete workflow example
This example uses a test project in tests/midscene. Before integrating, verify that the project runs locally.
1. Configure the model
In your GitHub repository's Settings → Secrets and variables → Actions, add:
Use the same model settings as for local runs; see Supported models & setup for specific values.
2. Add a workflow file
Create .github/workflows/midscene.yml:
Adjust working-directory and command for your project. See the midscene-action documentation for the full list of parameters.
3. Publish reports to Cloudflare Workers (optional)
Set publish-pages: true to publish reports to Cloudflare Workers. Each run gets its own preview URL in the workflow Summary.
- Free hosting: no charge for static asset storage or requests. Billing details
- Retention: up to 100 Previews per Worker on the free plan. Cloudflare removes the least recently deployed Preview when the limit is reached. Preview limits
- Limits: up to 20,000 files per Worker version and 25 MiB per file on the free plan. Platform limits
Create an API token
Choose the token permissions for your Worker setup:
| Worker setup | Preparation | API token permissions |
|---|---|---|
| ⭐ Use an existing Worker (recommended) |
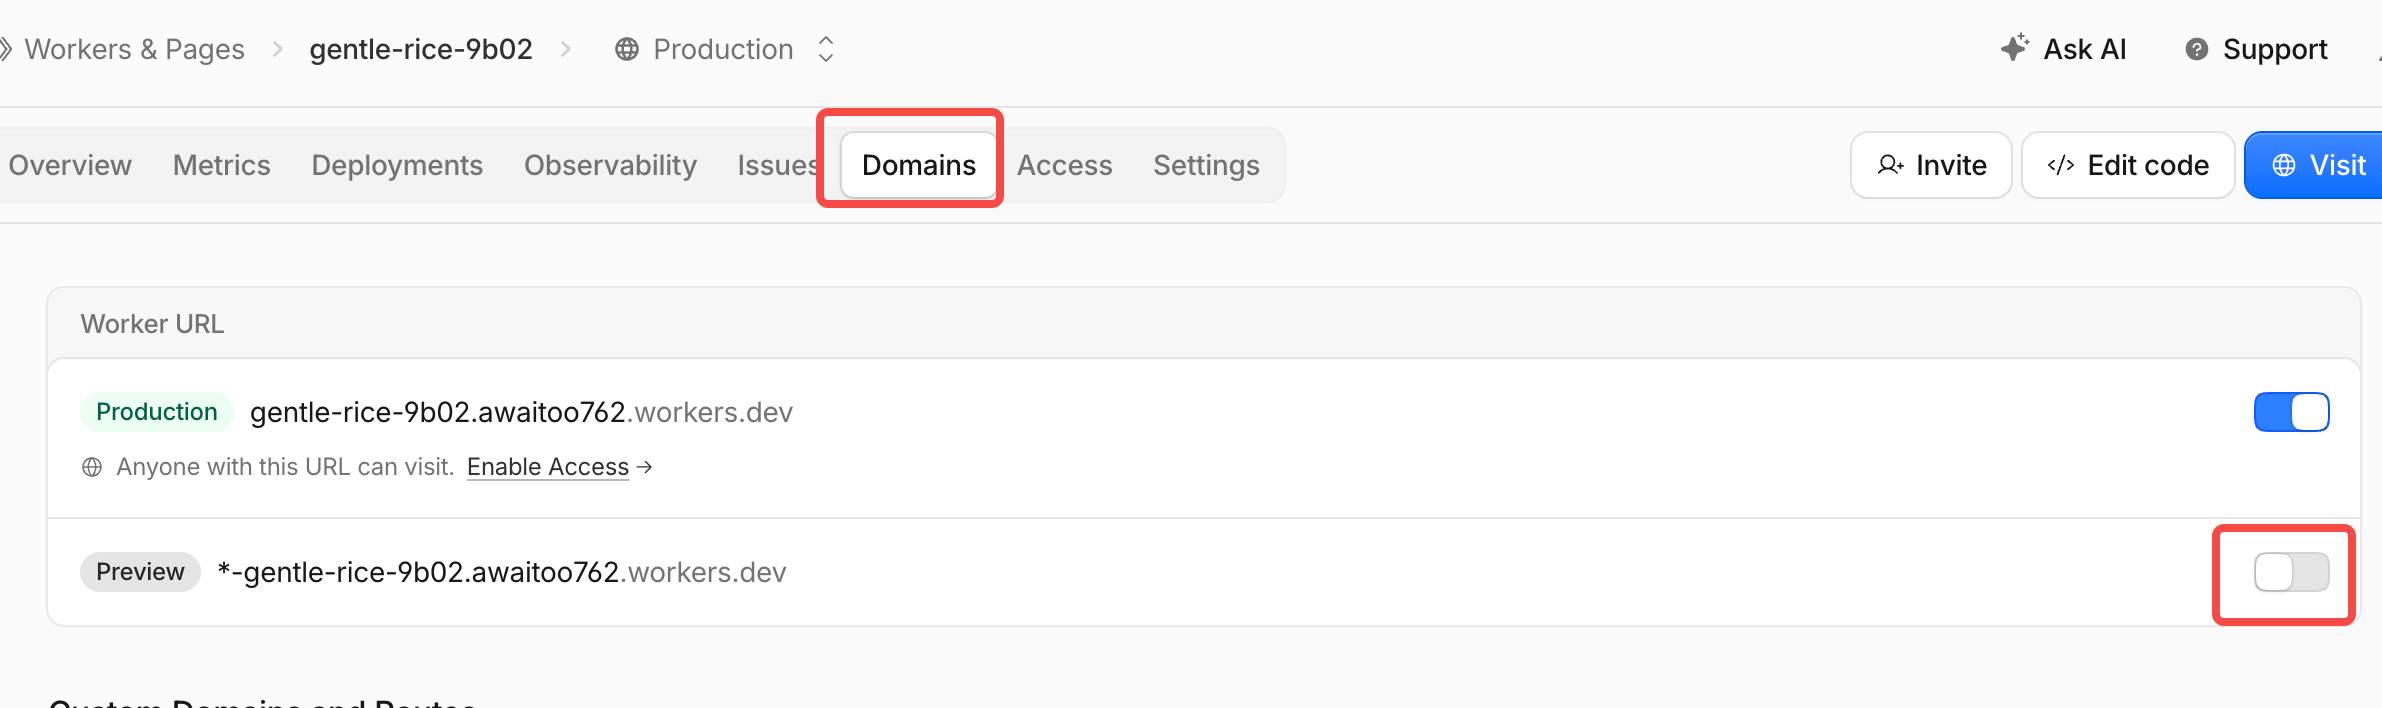 | Choose Specified Workers, select your Worker, and grant Individual Workers → Editor.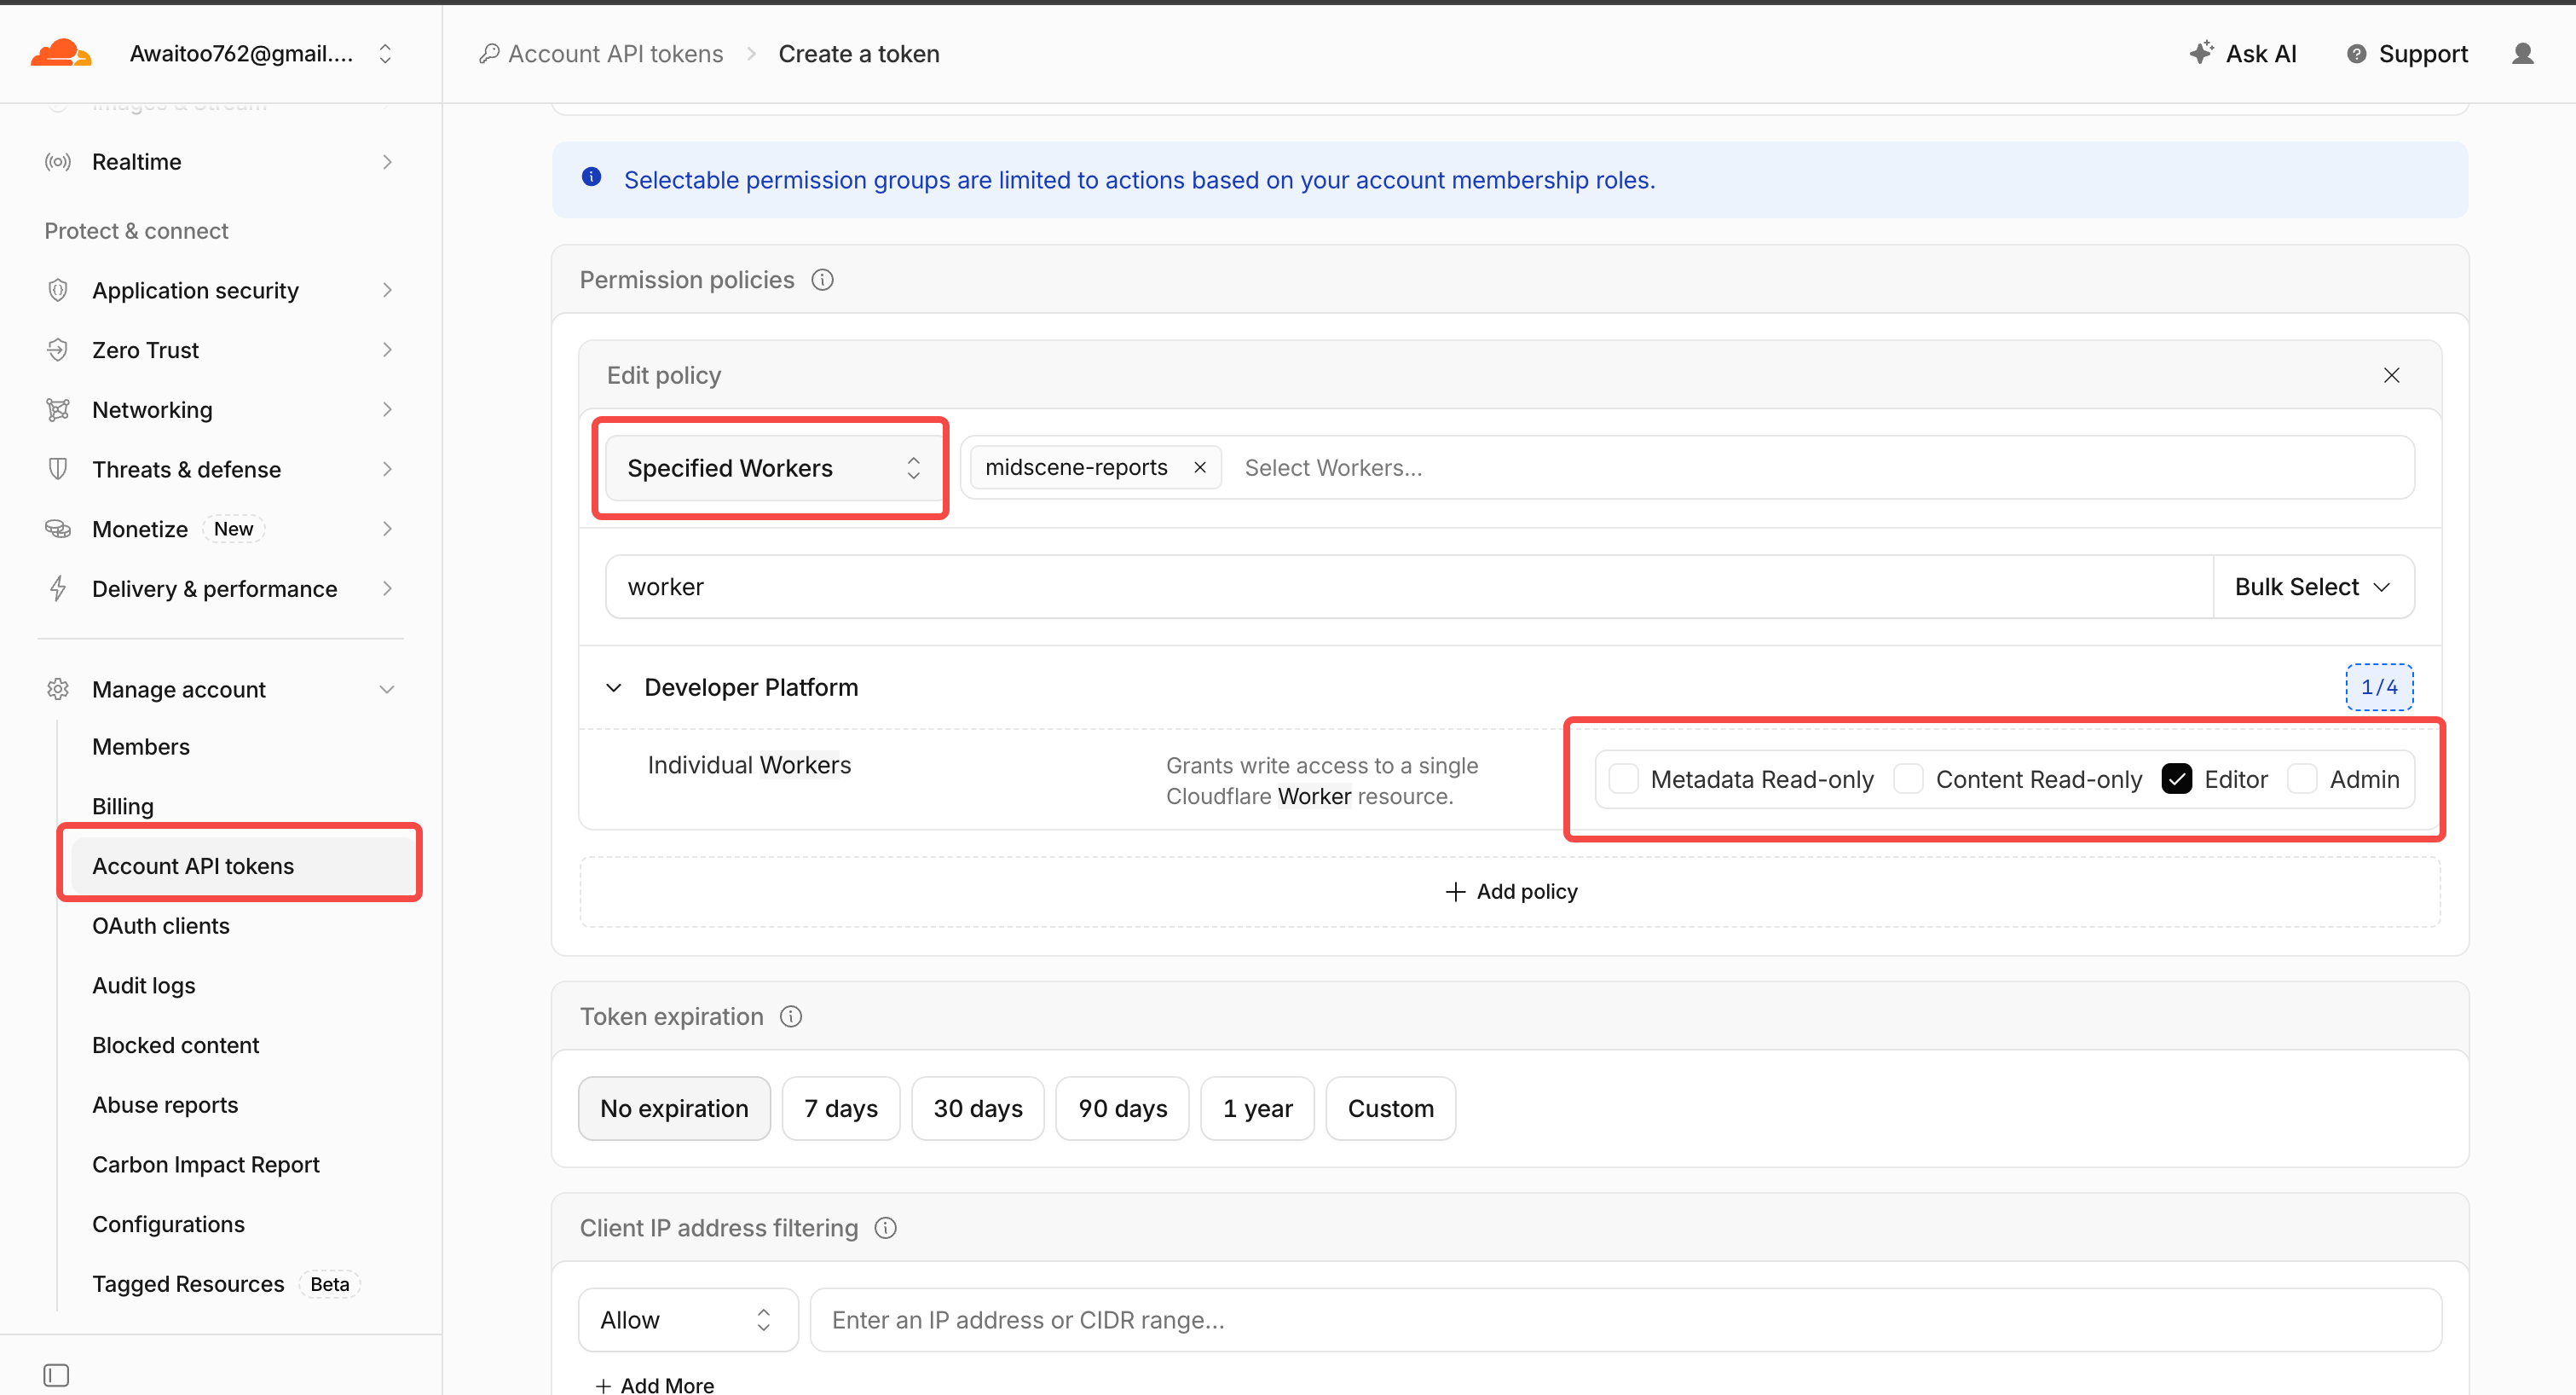 |
| Let the Action create a Worker | Set cloudflare-worker-name to the name you want to use. | Choose Entire Account and grant Workers → Admin. This allows access to all Workers in the account.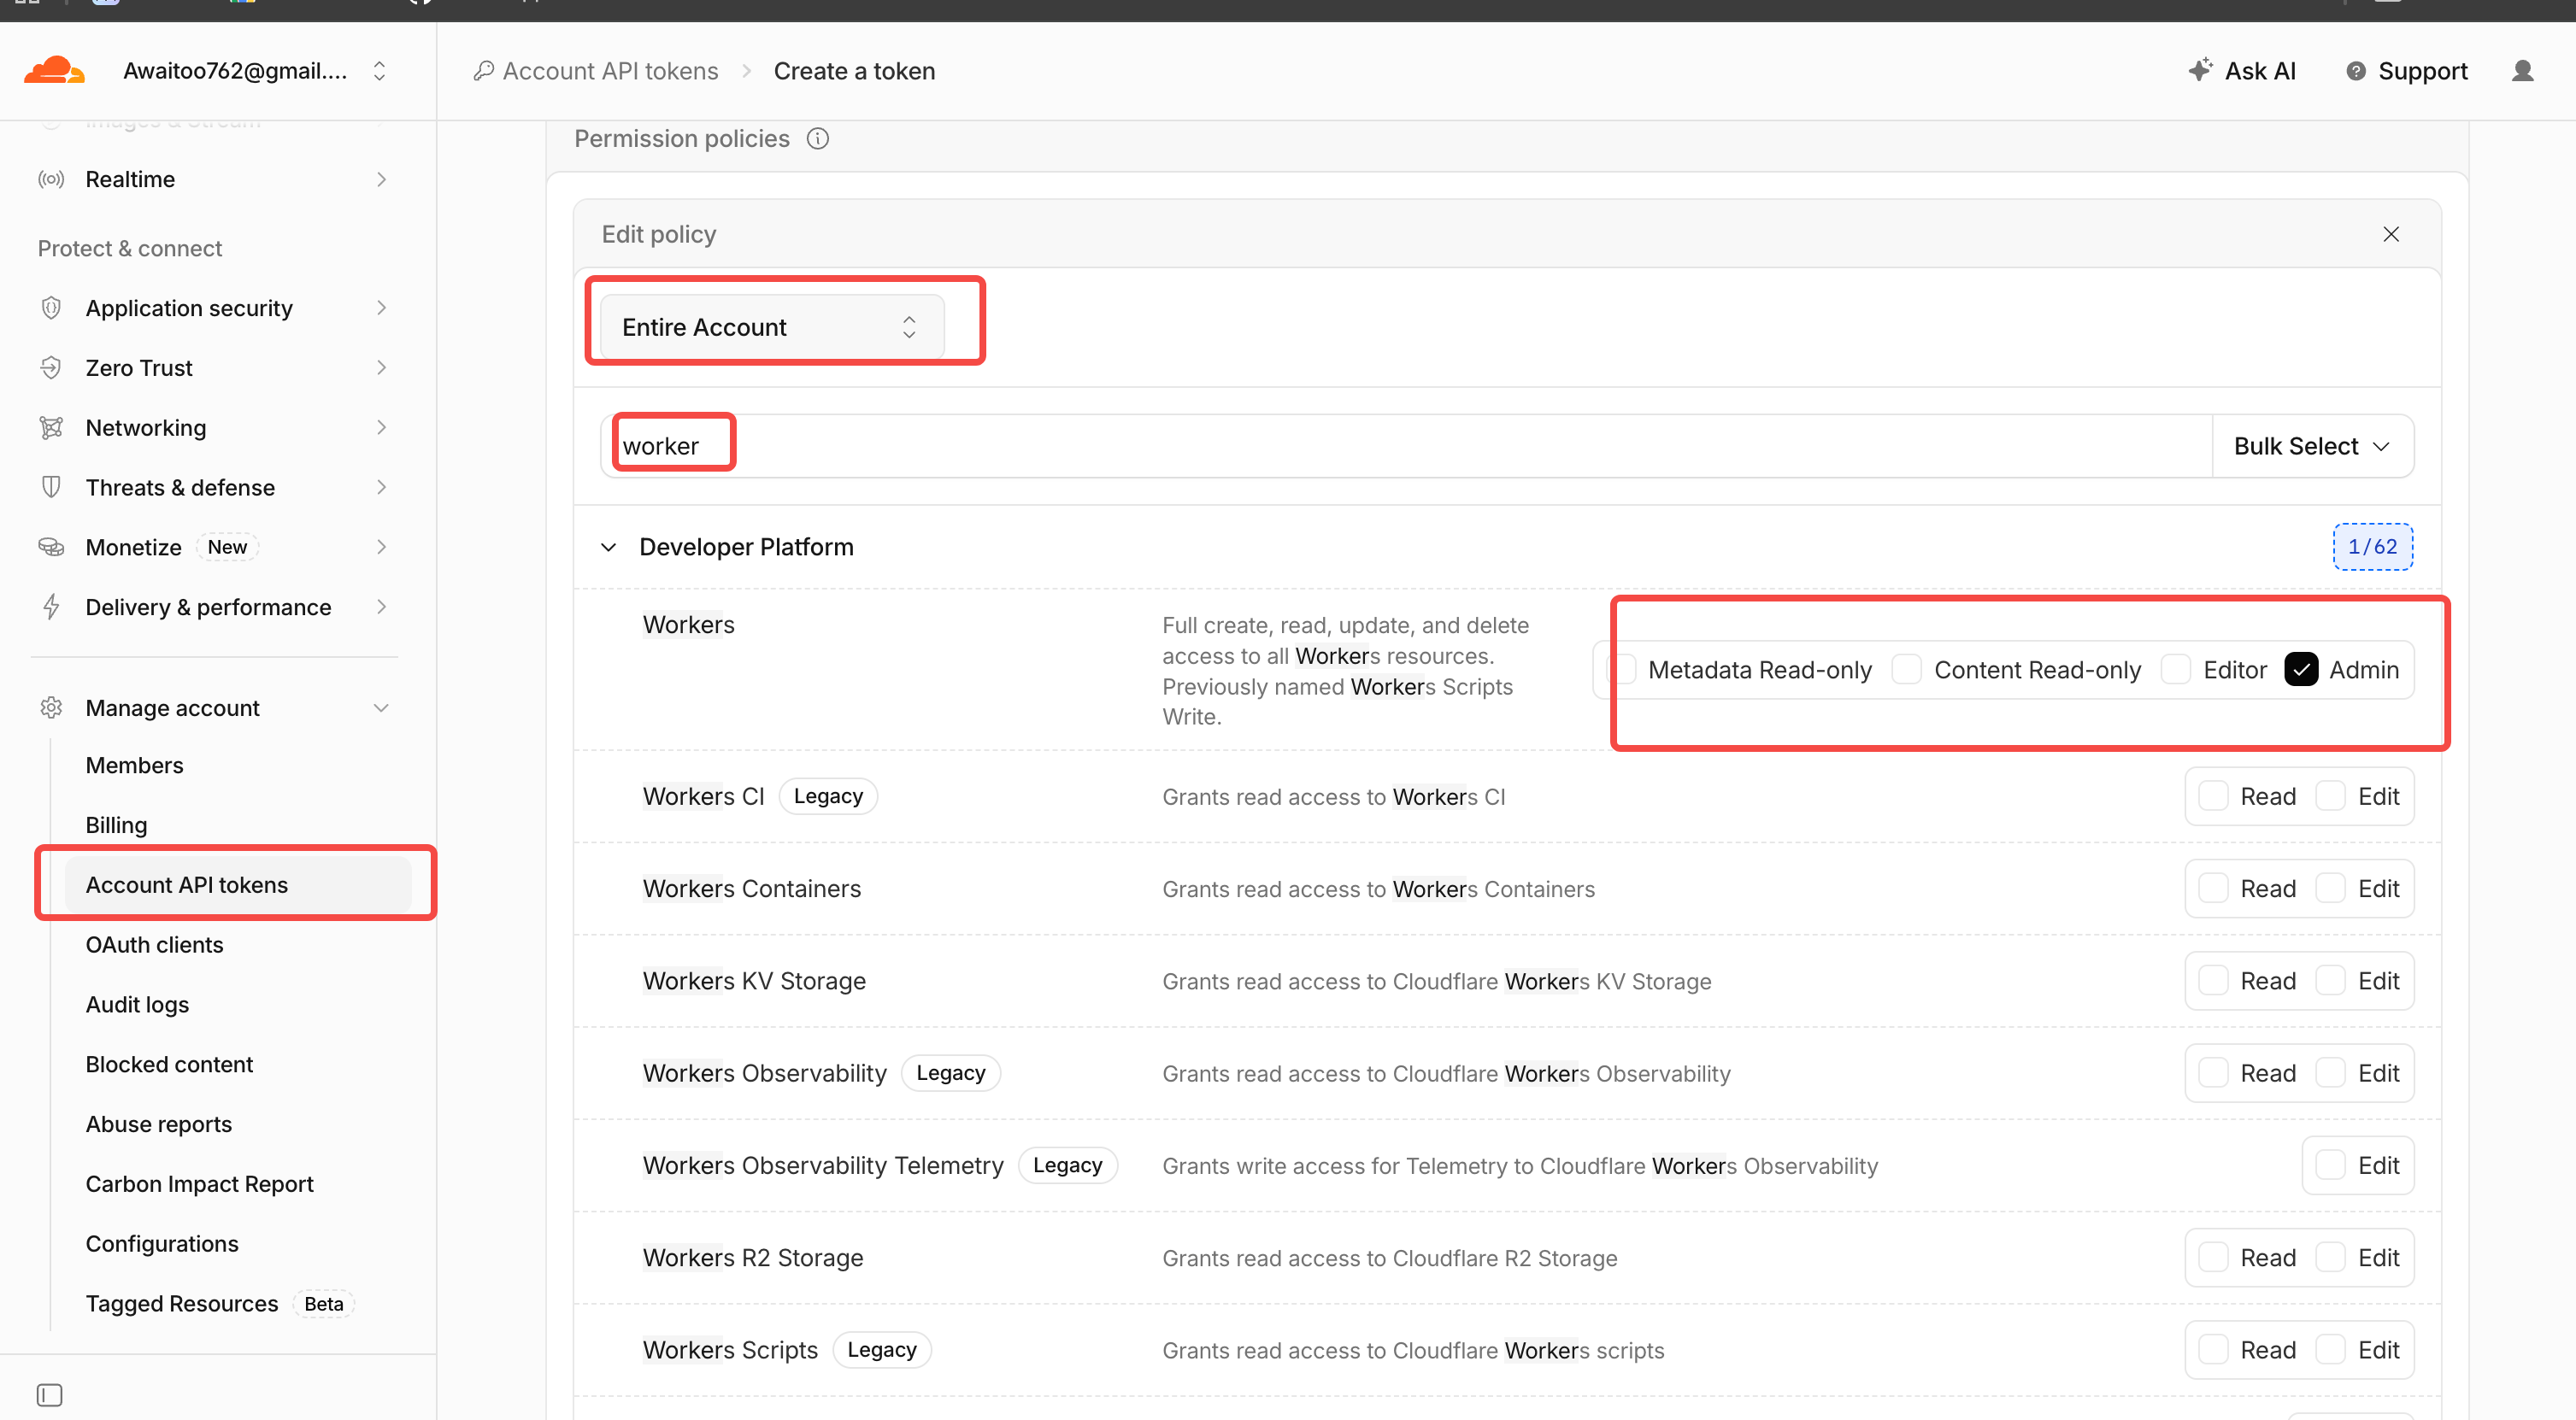 |
Save the API token and Account ID from the confirmation dialog. The token is shown only once.
Enable publishing
In Settings → Secrets and variables → Actions, add:
CLOUDFLARE_API_TOKENas a repository secret.CLOUDFLARE_ACCOUNT_IDas a repository variable.
Update the test Action step from the workflow above:
To use an existing Worker, set cloudflare-worker-name to its name. The default is midscene-reports.
4. View test reports
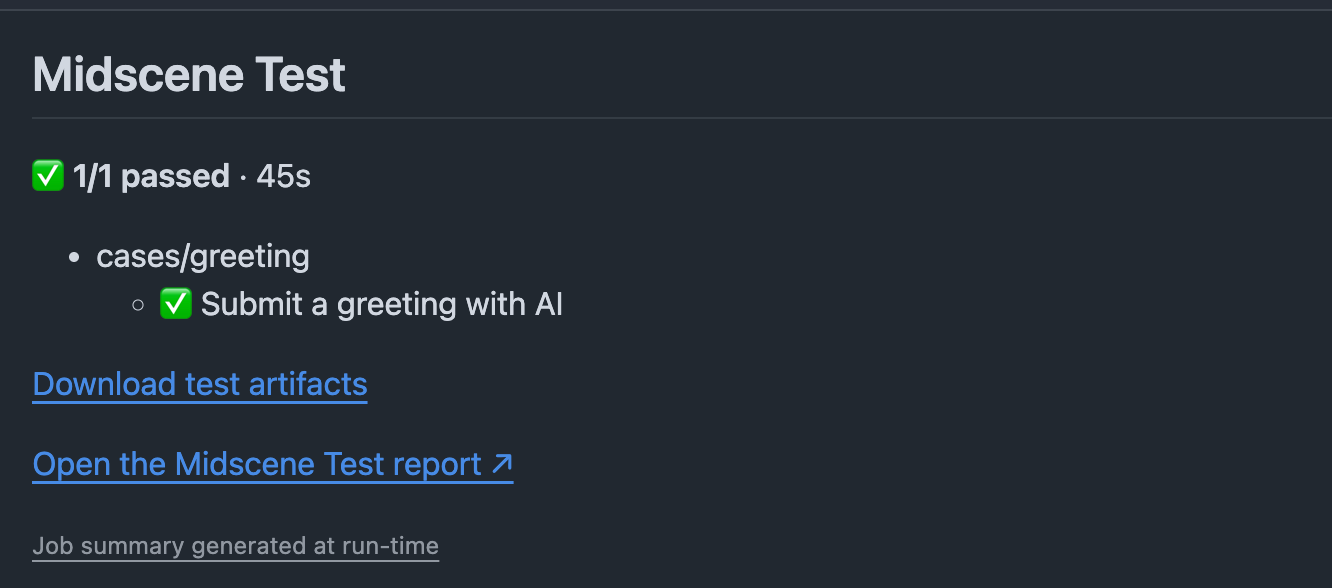
After the tests finish, view test results and report links in the workflow Summary.
Read Action outputs
Set id: midscene on the Action step, then read its outputs through ${{ steps.midscene.outputs.<name> }}: