

Bridge mode by Chrome extension
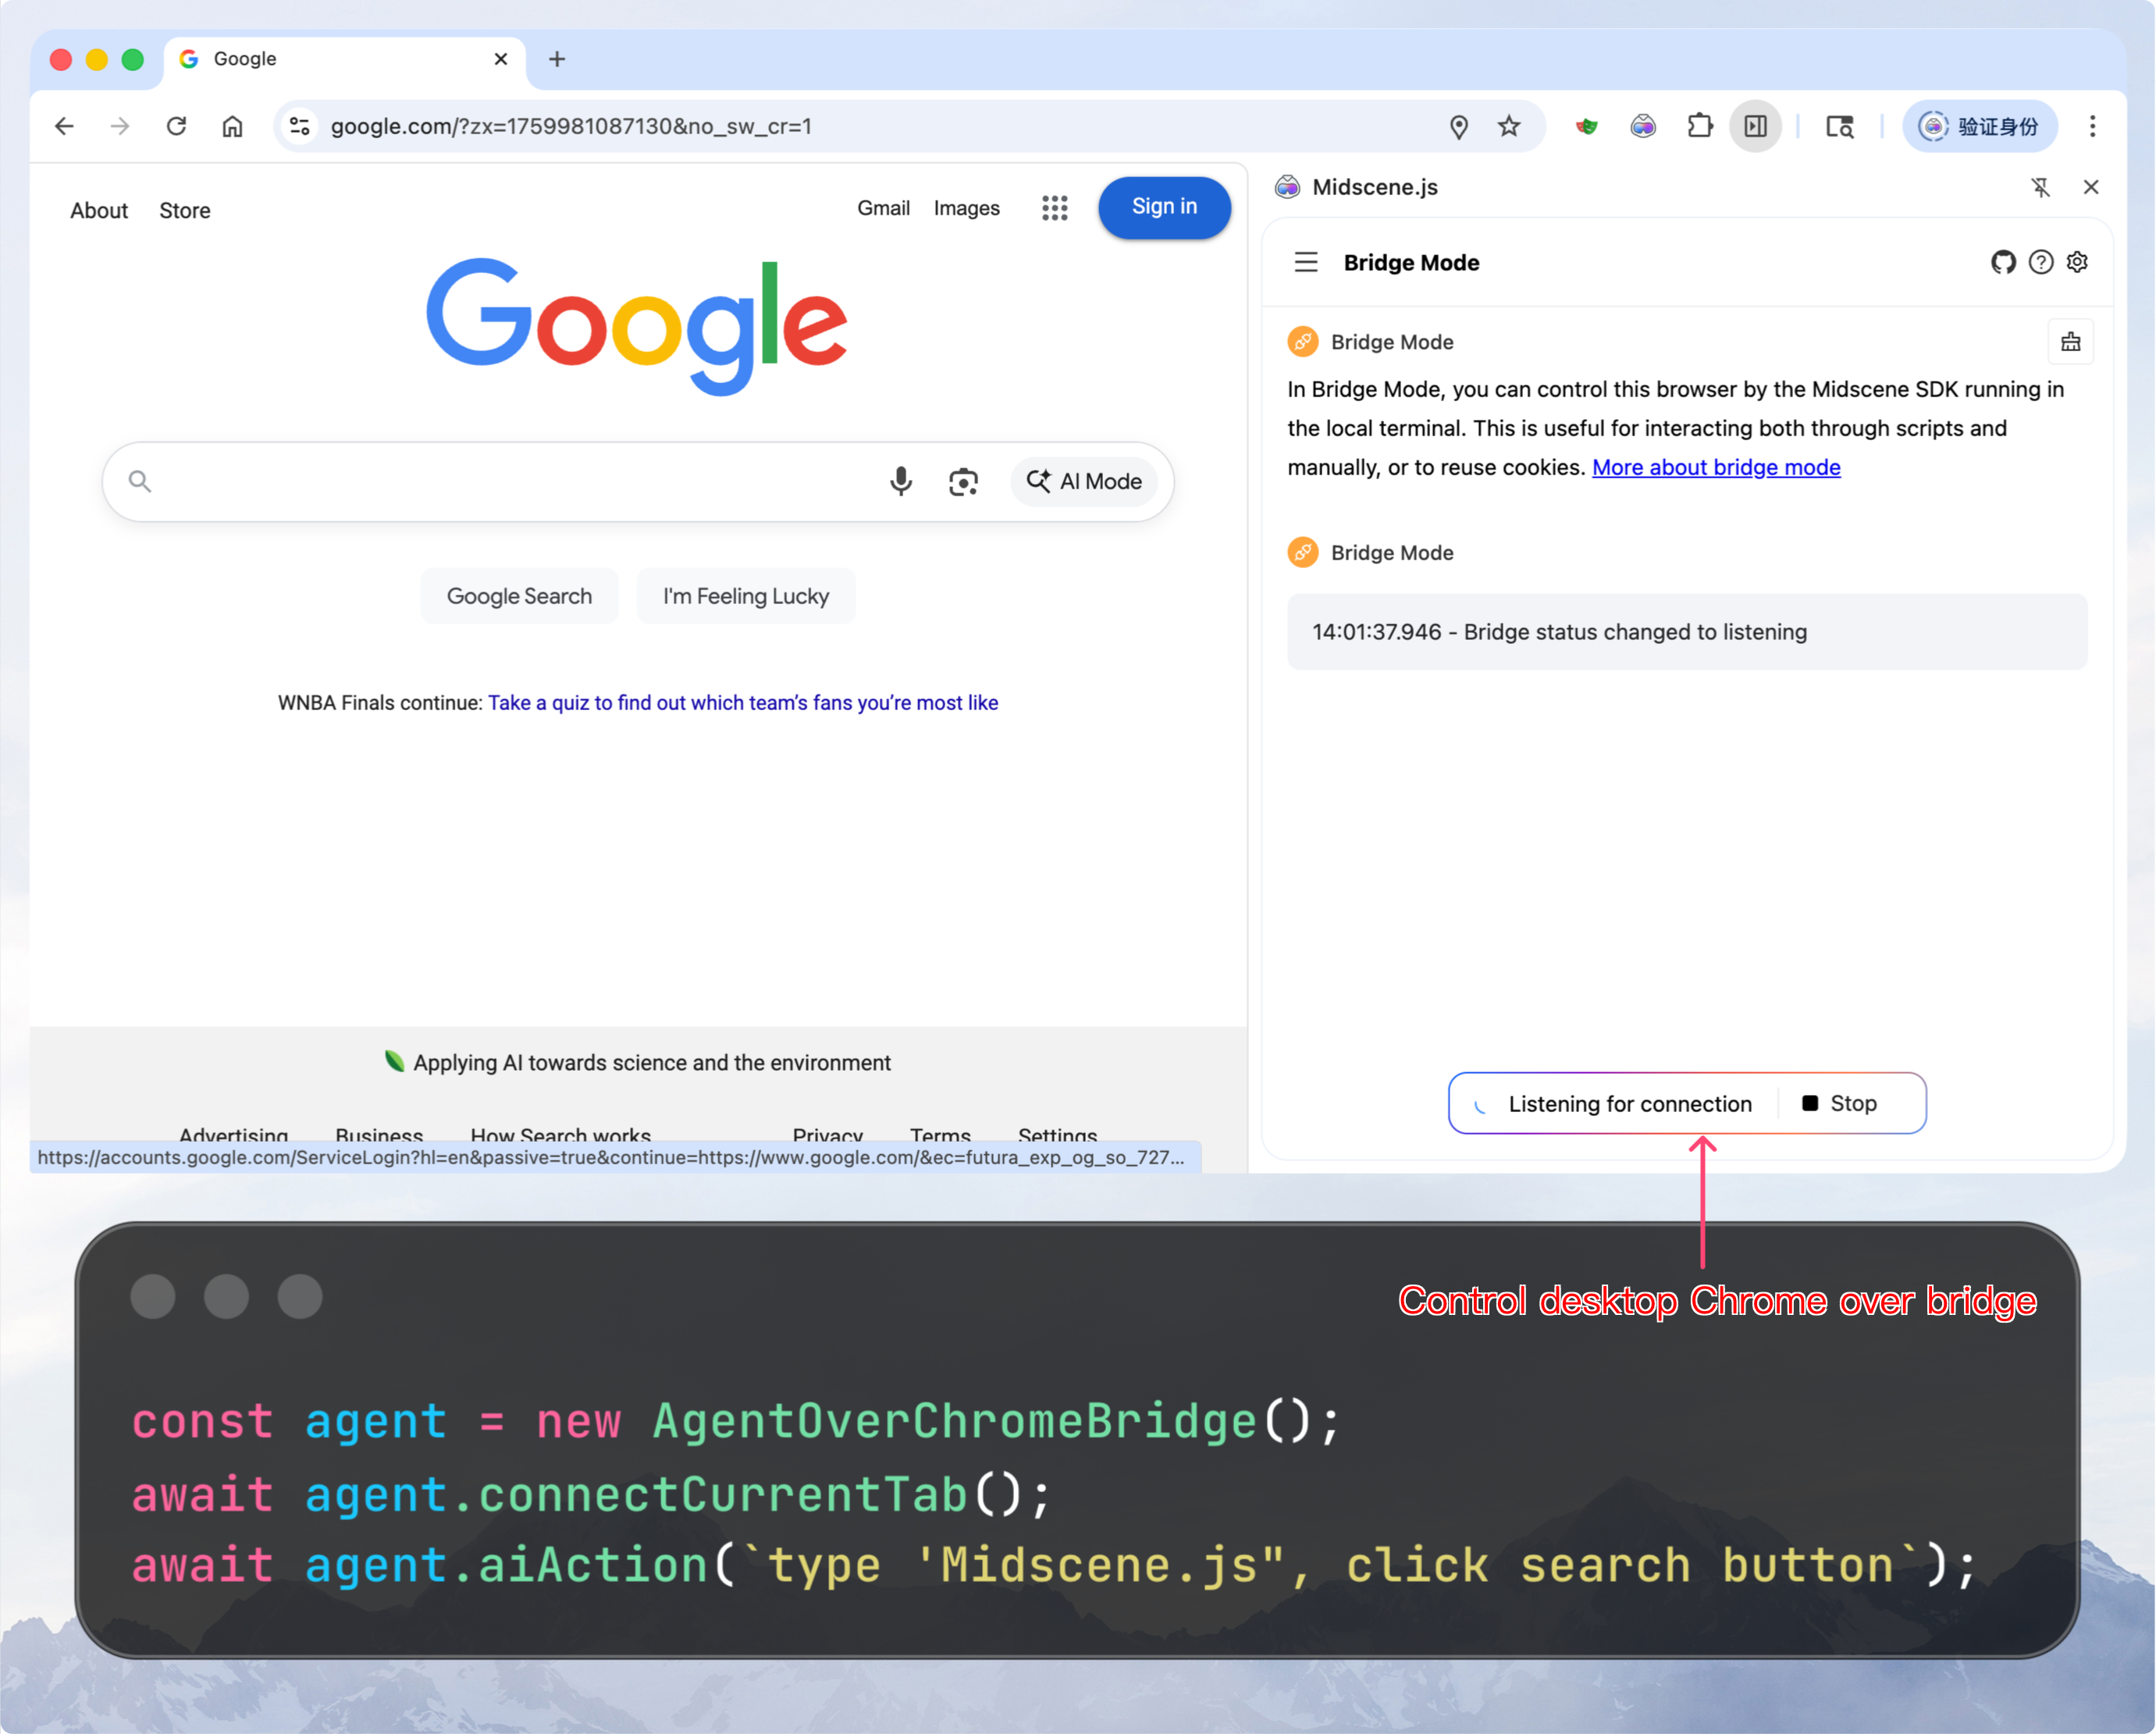
The bridge mode in the Midscene Chrome extension is a tool that allows you to use local scripts to control the desktop version of Chrome. Your scripts can connect to either a new tab or the currently active tab.
Using the desktop version of Chrome allows you to reuse all cookies, plugins, page status, and everything else you want. You can work with automation scripts to complete your tasks. This mode is commonly referred to as 'man-in-the-loop' in the context of automation.
check the demo project of bridge mode: https://github.com/web-infra-dev/midscene-example/blob/main/bridge-mode-demo
Set up AI model service
Set your model configs into the environment variables. You may refer to choose a model for more details.
In bridge mode, the AI models configs should be set in the Node.js side instead of the browser side.
Step 1. Install Midscene extension from Chrome web store
Install Midscene extension from Chrome web store
Step 2. Install dependencies
Step 3. Write scripts
Write and save the following code as ./demo-new-tab.ts.
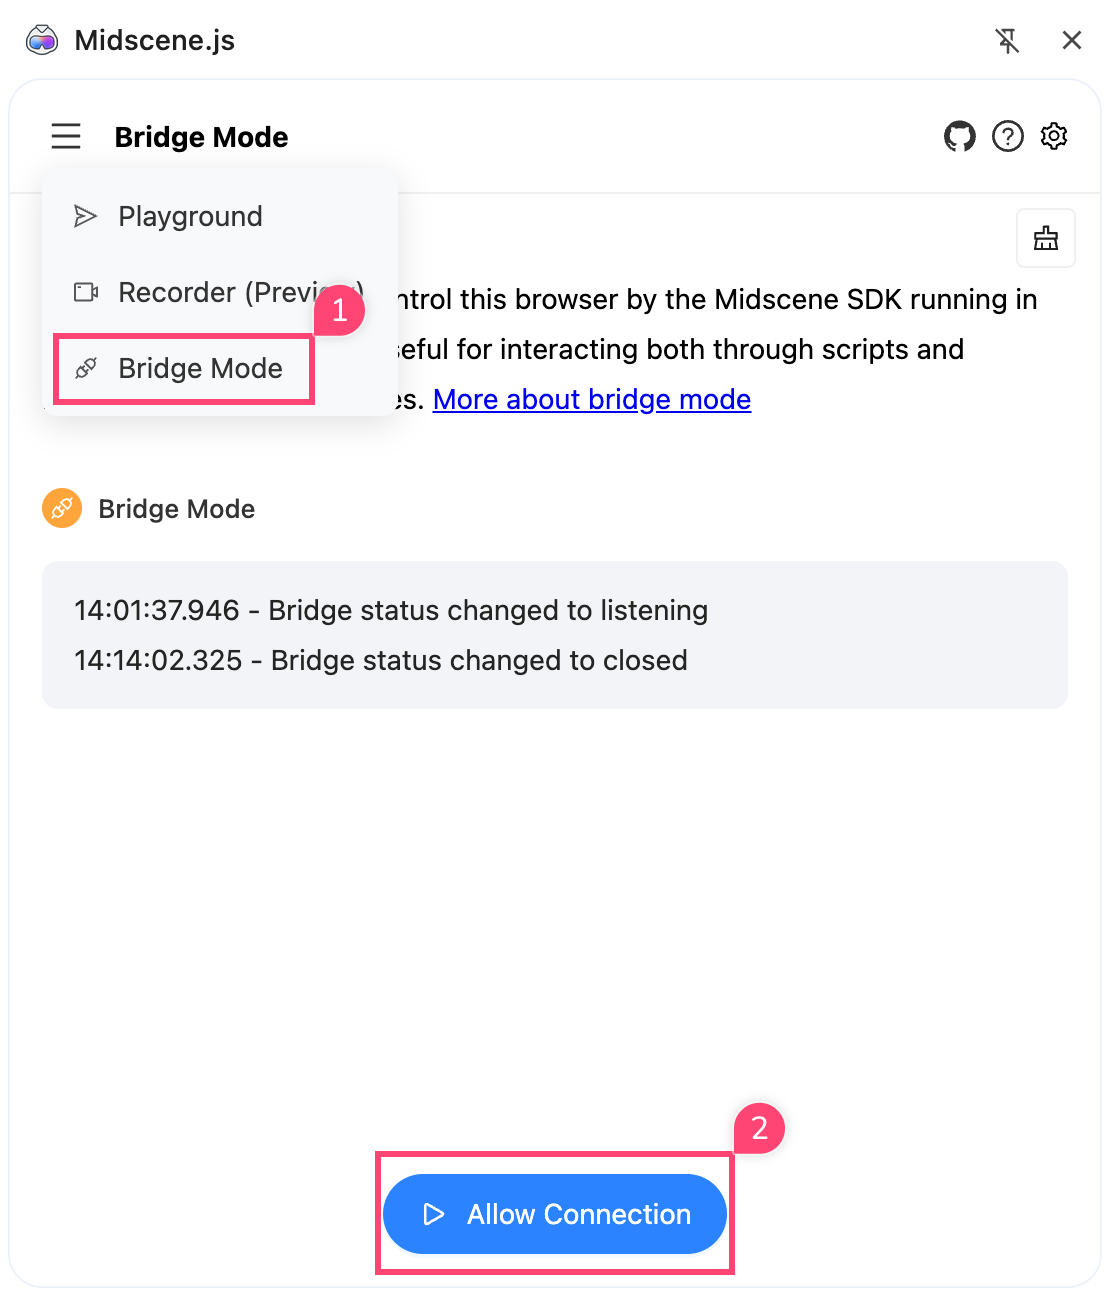
Step 4. Start the Chrome extension
Start the chrome extension and switch to 'Bridge Mode' tab. Click "Allow connection".
Step 5. Run the script
Run your scripts
After executing the script, you should see the status of the Chrome extension switched to 'connected', and a new tab has been opened. Now this tab is controlled by your scripts.
Whether the scripts are run before or after clicking 'Allow connection' in the browser is not significant.
Constructor
Except the normal parameters in the agent constructor, AgentOverChromeBridge accepts one more parameter:
closeNewTabsAfterDisconnect?: boolean: If true, the newly created tab will be closed when the bridge is destroyed. Default is false.
Methods
Except the normal agent interface, AgentOverChromeBridge provides some other interfaces to control the desktop Chrome.
You should always call connectCurrentTab or connectNewTabWithUrl before doing further actions.
Each of the agent instance can only connect to one tab instance, and it cannot be reconnected after destroy.
connectCurrentTab()
Connect to the currently active tab.
- Type
-
Parameters:
options?: object- Optional configuration objectforceSameTabNavigation?: boolean- If true (default), restricts pages from opening new tabs, forcing new pages to open in the current tab to prevent AI operation failures due to manual tab switching. This configuration usually doesn't need to be changed
-
Returns:
- Returns a Promise that resolves to void when connected successfully; throws an error if connection fails
-
Example:
connectNewTabWithUrl()
Create a new tab and connect to it immediately.
- Type
-
Parameters:
url: string- URL to open in the new taboptions?: object- Optional configuration object (same parameters as connectCurrentTab)
-
Returns:
- Returns a Promise that resolves to void when connected successfully; throws an error if connection fails
-
Example:
destroy()
Destroy the connection and release resources.
- Type
-
Parameters:
closeNewTabsAfterDisconnect?: boolean- If true, the newly created tab will be closed when the bridge is destroyed. Default is false. The will override thecloseNewTabsAfterDisconnectparameter in the constructor.
-
Returns:
- Returns a Promise that resolves to void when destruction completes
-
Example:
Use bridge mode in YAML script
Yaml scripts is a way for developers to write automation scripts in yaml format, which is easy to read and write comparing to javascript.
To use bridge mode in yaml script, set the bridgeMode property in the target section. If you want to use the current tab, set it to currentTab, otherwise set it to newTabWithUrl.
Set closeNewTabsAfterDisconnect to true if you want to close the newly created tabs when the bridge is destroyed. This is optional and the default value is false.
For example, the following script will open a new tab by Chrome extension bridge:
Run the script:
Remember to start the chrome extension and click 'Allow connection' button after the script is running.
Unsupported options
In bridge mode, these options will be ignored (they will follow your desktop browser's settings):
- userAgent
- viewportWidth
- viewportHeight
- viewportScale
- waitForNetworkIdle
- cookie
FAQ
- Where should I config the
OPENAI_API_KEY, in the browser or in the terminal?
When using bridge mode, you should config the OPENAI_API_KEY in the terminal.